6 Ways To Reslove Outlook Data File Cannot Be Accessed Problem
Microsoft Outlook comes with a robust set of features that makes emailing a seamless process. Outlook data files (OST and PST) have a copy of every little information in your mail that is stored on the server of the email. With the assistance of OST, you can work in Outlook even when you are offline.
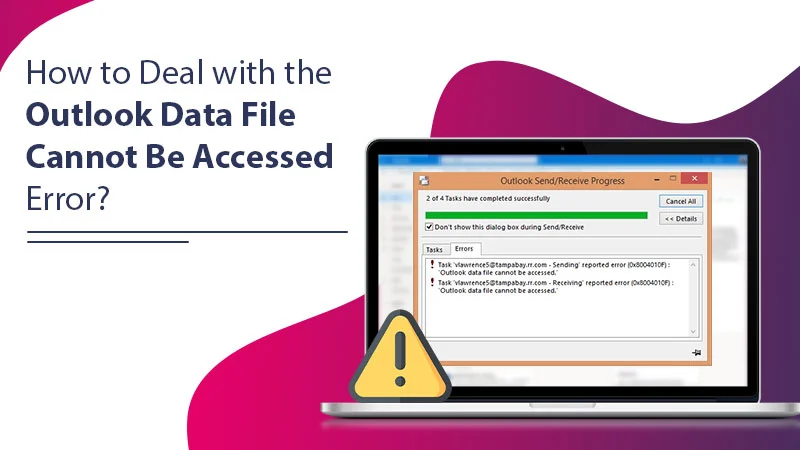
But sometimes, you may find it challenging to access your mailbox through this Outlook data file. The error message Outlook data file cannot be accessed will show on the screen. Issues with OST and PST are largely responsible for this error. But there are several ways to troubleshoot it. In this article, you’ll find exactly what you can do to resolve it.
Read Also: Why Outlook disconnected from server
Causes Why Outlook Data File Cannot Be Accessed
Apart from the one significant reason mentioned above, there are many other things that can lead to this problem. Here are some probable reasons.
- If there is any modification in the location of the OST file, it will result in this error.
- Inadequate read/write permissions.
- Damaged Outlook profile.
- Corrupt Outlook program files.
- A poor internet connection is another reason.
- A corrupt OST file
Read Also: Why Outlook Cannot Connect To Server
How To Resolve Outlook Data File Cannot Be Accessed Error
Now that you know some more about the causes, here are some suitable measures for this issue. You can implement them as per what you think led to the error.
1. Make Another Outlook Profile
A damaged Outlook profile usually is a common cause of the error. An easy method to fix this problem is to make another (new) Outlook profile. Here is how you can do it.
- Launch ‘Control Panel and tap ‘Mail.’
- The ‘Mail Setup’ will open.
- Here, tap ‘Show Profiles.’
- To make another profile, tap ‘Add.’
- In ‘Profile Name’, give a name and tap ‘OK.’
- Now you must input the needed details like the email, password, and name in the window of ‘Add Account.’
- Tick the checkbox of ‘Change Account Settings’ and tap ‘Next.’
- Choose the previous profile and hit ‘Remove.’
- Tap the button ‘Always use this profile and choose the new profile name.
- Lastly, tap ‘OK.’
- Now start Outlook again.
2. Repair the Existing Outlook Profile
Problems in the OST file often result in the Outlook data file cannot be found error. You can repair the OST file by repairing your existing Outlook profile through these steps.
- Navigate to ‘File’ followed by ‘Account Settings’ and then ‘Account Settings again.
- Tap ‘Change Folder.’
- Make a temporary data file by tapping ‘New Outlook Data File.’
- Give a name to the data file and tap ‘OK.’
- From the subfolders, choose the ‘Inbox.’
- Exit the dialog box by tapping ‘OK.’
- Tap the ‘Change Folder button.
- Choose your earlier inbox folder data file and tap ‘OK.’
- Tap the ‘Data File’ tab and remove the temporary OST file.
- Exit the dialog box of ‘Account Settings’ and tap ‘Send/Receive.’ The error will be fixed by now.
3. Employ the Additional Mailboxes Functionality
You can employ this feature if the problem occurs due to the additional mailbox functionality.
Here is how you can do so.
- Back up the data file and delete the shared mailboxes.
- Now, open Outlook.
- Expand ‘File’ and choose ‘Account Settings’ followed by ‘Account Settings.’
- Tap ‘Main Account’ followed by clicking on ‘Change.’
- Launch ‘More Settings’ and go to the ‘Advanced’ tab.
- Tap ‘Add.’
- Add the shared mailboxes and see if the problem resolves.
4. Make Another Data File
Another thing you can do when you notice that your Outlook data file cannot be opened is to create a new data file. Follow these steps to create the file.
- Open the ‘Control Panel and choose ‘Mail.’
- Now, head over to the ‘Data File’ tab.
- Tap ‘Add.’ Click ‘Save’ to save the data file.
- Choose the data file you have made and tap ‘Set as Default.’
- Navigate to the ‘Email’ tab. Here, choose the Outlook account that is causing the issue.
- Tap ‘Change Folder’ and choose the data file you have just made by tapping the ‘Newly created data file.’
- Begin Outlook. See if the problem is resolved or not.
- If the issue remains, launch ‘File’ in Outlook and choose ‘Open & Export.’
- Tap ‘Open Outlook Data File’ and go to the earlier PST file.
- Double-tap the PST file. You won’t find the problem persisting after that.
5. Repair the Inbox
The ScanPST tool from Microsoft helps you in fixing the corruption or damage in the Outlook data file. You can perform a repair using this tool by following the steps below.
- Turn on the viewing of the protected and hidden system files on your computer.
- Close Outlook.
- Also, ensure that you close all the associated processes. You can do so by going to the task manager.
- Right-tap on ‘Windows’ and choose ‘Run.’
- Go to the location given in the following path: \Program Files\Microsoft Office\root\Office16. This path is for 64-bit Office installation.
- Locate the ‘ScanPST.exe’ and right-tap on it.
- Choose ‘Run as Administrator.’
- In the repair tool, choose ‘Browse’ and go to the location of the file.
- After that, tap ‘Start.’
- Wait for some time till the scan finishes.
- If the tool shows a file use error, you must do a clean boot of your system.
- After that, begin Outlook again and see if your problem has been resolved.
6. Fix the Corrupt Cached Data Causing the Error
If the associated Outlook account is being used in the Exchange cached mode, damaged data is the reason behind the Outlook data file cannot be accessed error. You can fix the corrupt cached data by disabling the cached Exchange mode.
- Close Outlook and all associated applications.
- Launch ‘Control Panel.’
- Modify the ‘View’ dropdown. Choose ‘Large Icons.’
- Launch ‘Mail.’
- Now, tap ‘Email Accounts.’
- In the tab of ‘Email’, choose the defective account and tap ‘Change.’
- Tap ‘More Settings’ and navigate to the ‘Advanced’ tab.
- Remove the tick from ‘Download Shared Folders’ and then tap ‘Apply.’
- Open Outlook and see if the error resolves.
Read Also: Why Is Outlook Not Sending Emails
Final Thoughts
The Outlook data file cannot be accessed error negatively impacts your email communication. The methods above have all worked for numerous users in resolving the problem. You can apply them one by one and see which one gives you the desired result. If the error persists, it’s best to connect with the professionals of an email technical support service. They will find the root cause of the error and give you speedy fixes.
